Home lab and smart home diagrams
Over on the home lab, home networking and smart home subreddits, it has been fantastic to see diagrams of increasingly complex home computing and network setups being shared. Diagrams help home you understand the physical and logical connections between networked devices, and are useful for setting up security zones, upgrading hardware and debugging connection problems.
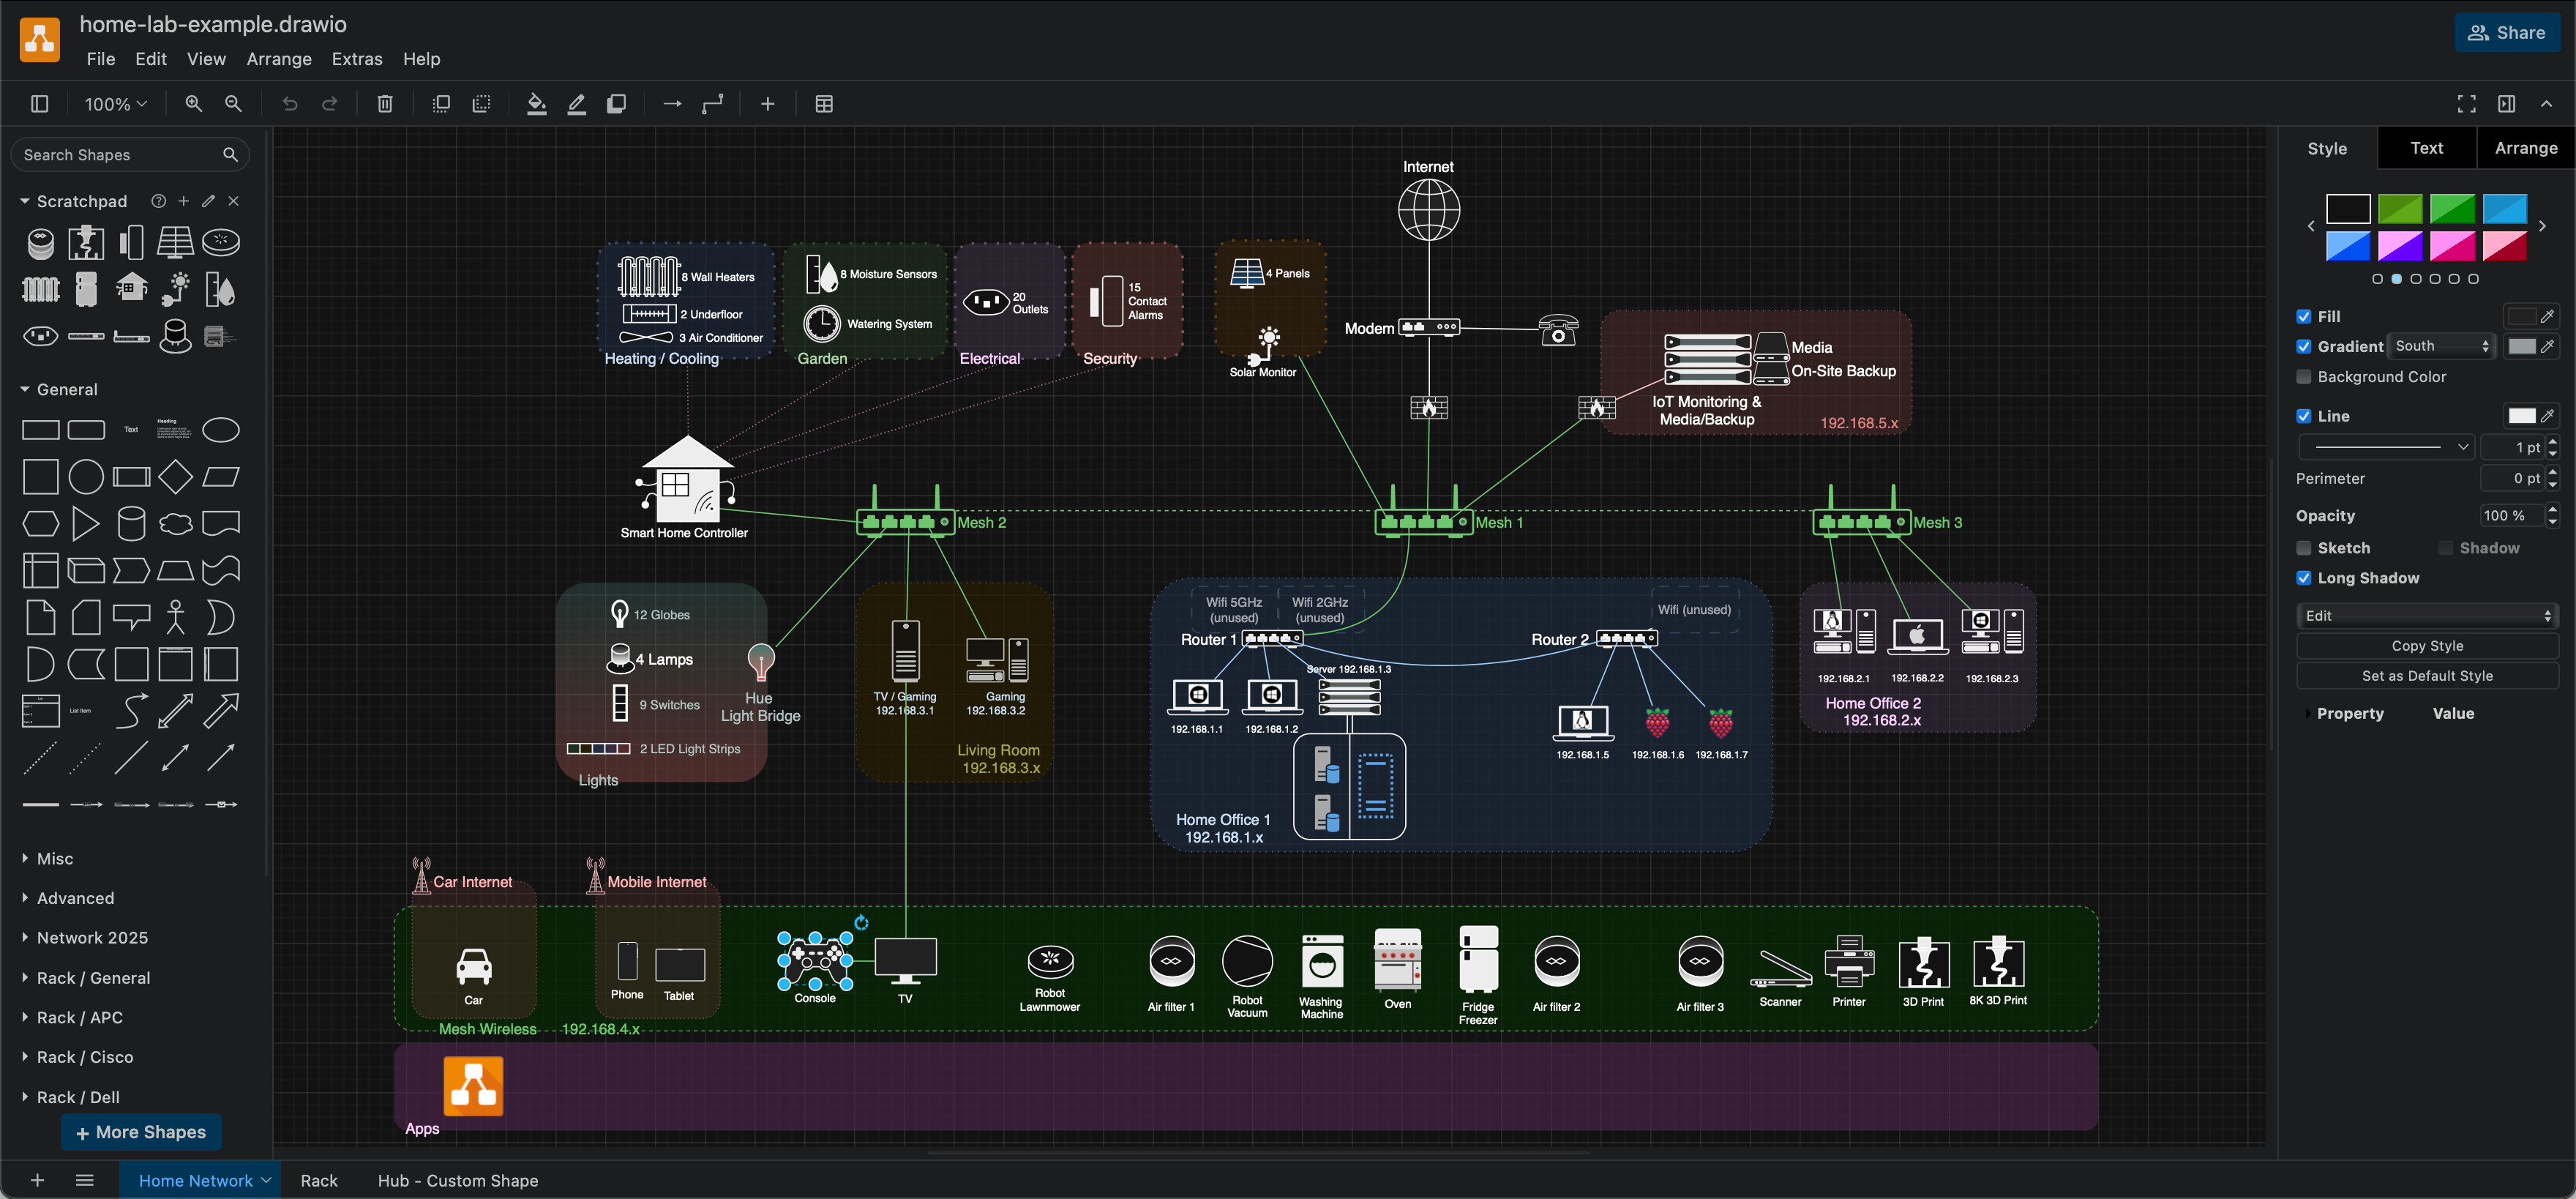
Home lab, home hub, home network and smart home diagrams are the common terms used interchangeably to refer to a range of infrastructure diagrams. These diagrams may organise devices and components by physical location, by security and access, by cabled connections, or in another logical grouping.
Draw custom smart home shapes
Many Internet of Things (IoT) devices and services are used in smart homes. These are rapidly developed and shape libraries in technical diagramming apps can’t keep up. In draw.io, you can create your own custom shapes for these devices.
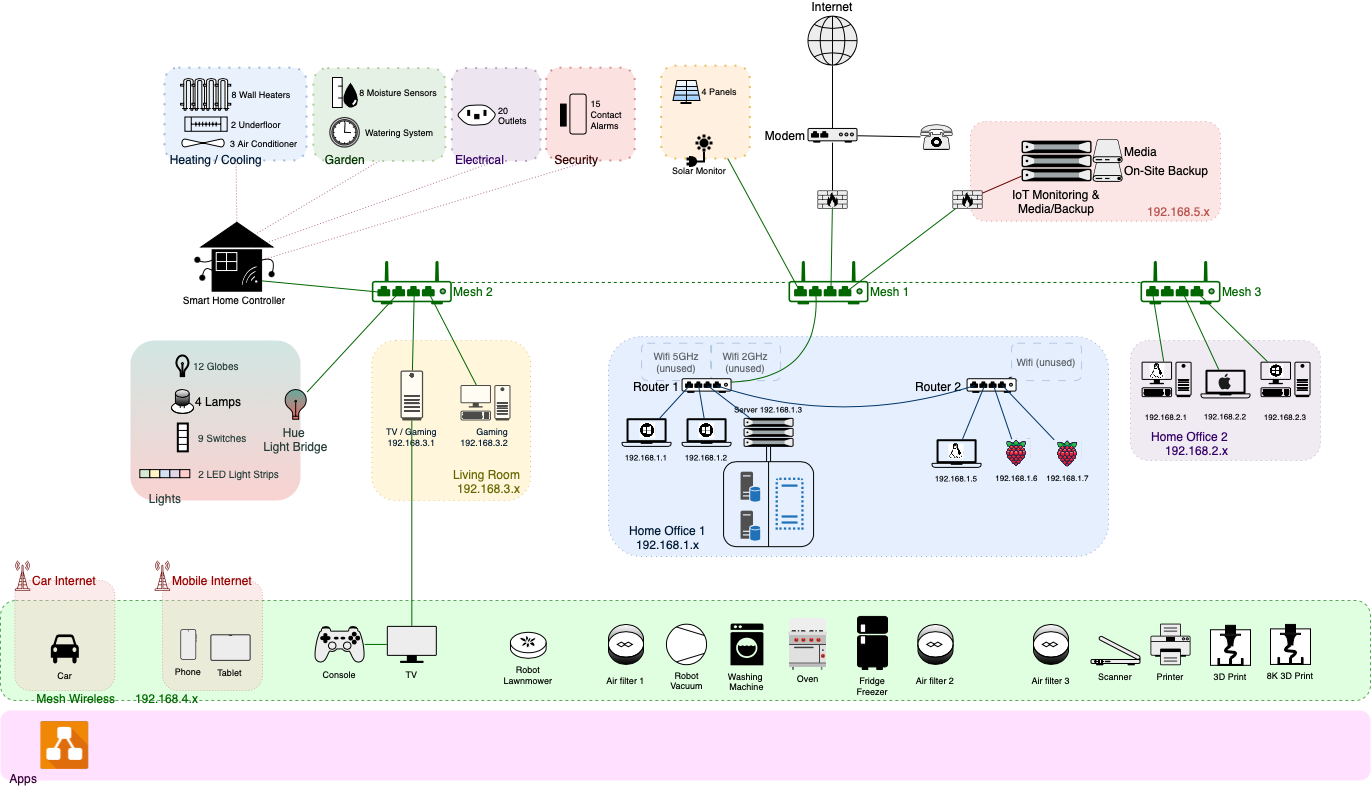
The example above uses the new Network 2025 shape library, with many custom shapes for smart devices and home appliances.
- Use Search Shapes to find and add multiple shapes from the draw.io libraries.
- Drag a selection box around all the shapes that make up your custom shape, right click and Group them together.
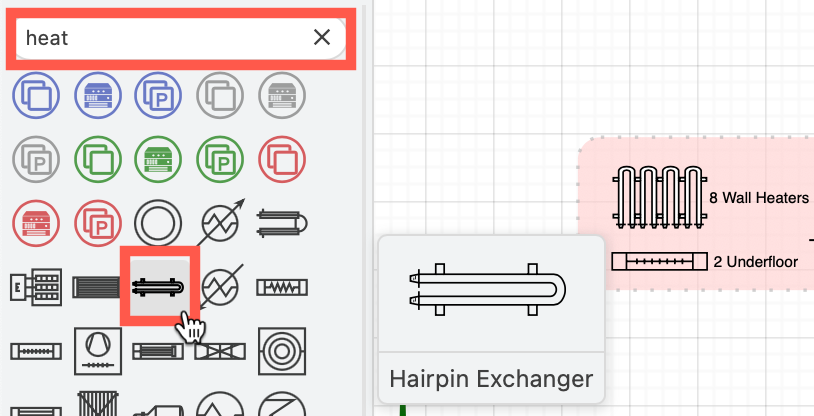
For example, this custom wall heater shape uses four overlapping hairpin exchanger shapes, grouped together.
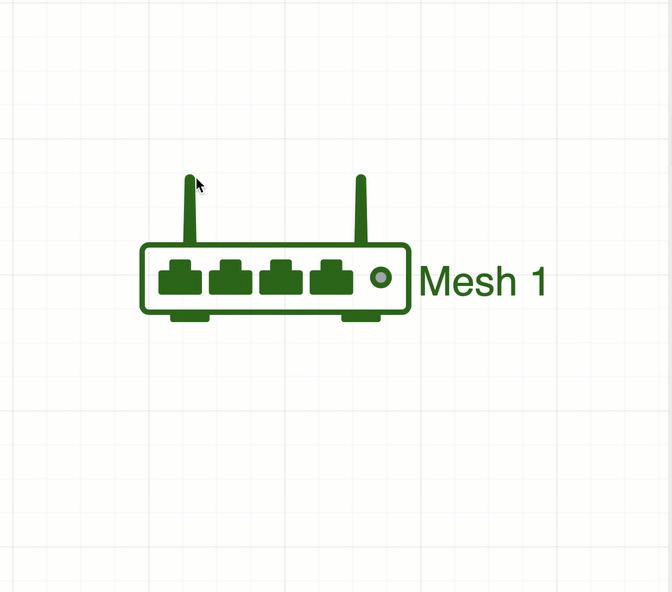
The custom hub shapes below combine rounded rectangles, circles, ethernet port shapes, and a delay shape as an antenna.

A custom hub shape lets you:
- label each port
- attach connectors to the ethernet port shapes within the custom shape
More ways to create custom shapes
Edit an existing shape: Change the attachment points of the Network library’s switch shape so connectors sit more neatly on each port. The mesh and router shapes have been edited to have four fixed connection points.
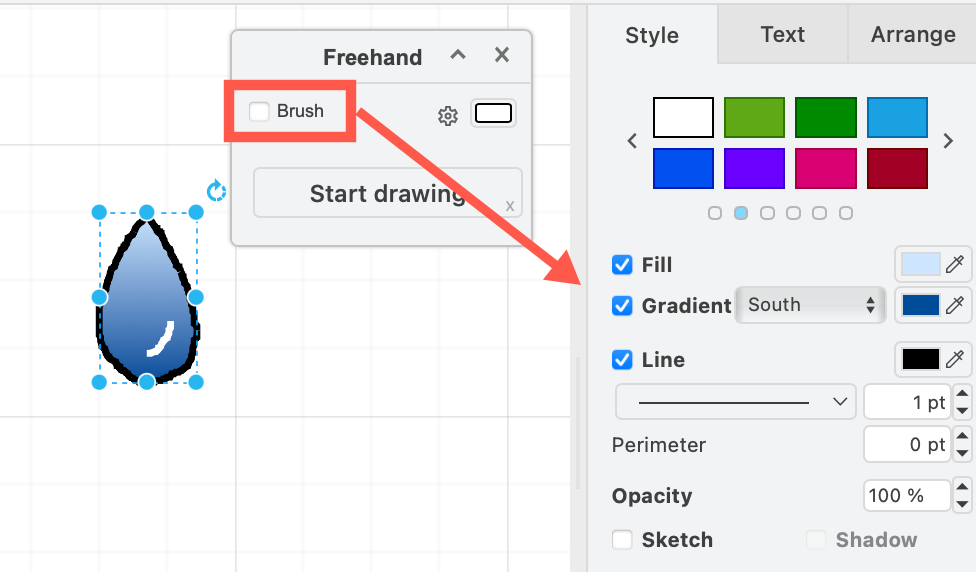
Draw a freehand shape: Click on the Freehand tool in the toolbar or select Arrange > Insert > Freehand from the menu. Disable the brush checkbox before drawing so you can style the outline and fill colours of your freehand shape.
Add a logo image: Drag and drop the file onto the drawing canvas.
![]()
Experienced users: Draw a new complex custom shape by describing its geometry and style in XML.
Create home lab zones with containers
While you can show/hide parts of your diagram with tags and layers, for home lab or smart home diagrams, container zones are more practical.
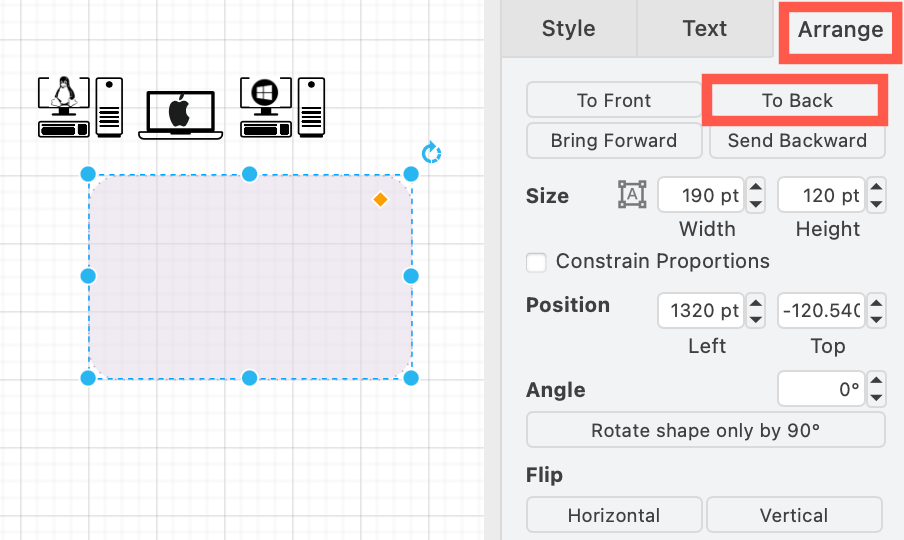
- Place a rectangular shape on the drawing canvas. While it is selected, click on To Back in the Arrange tab.
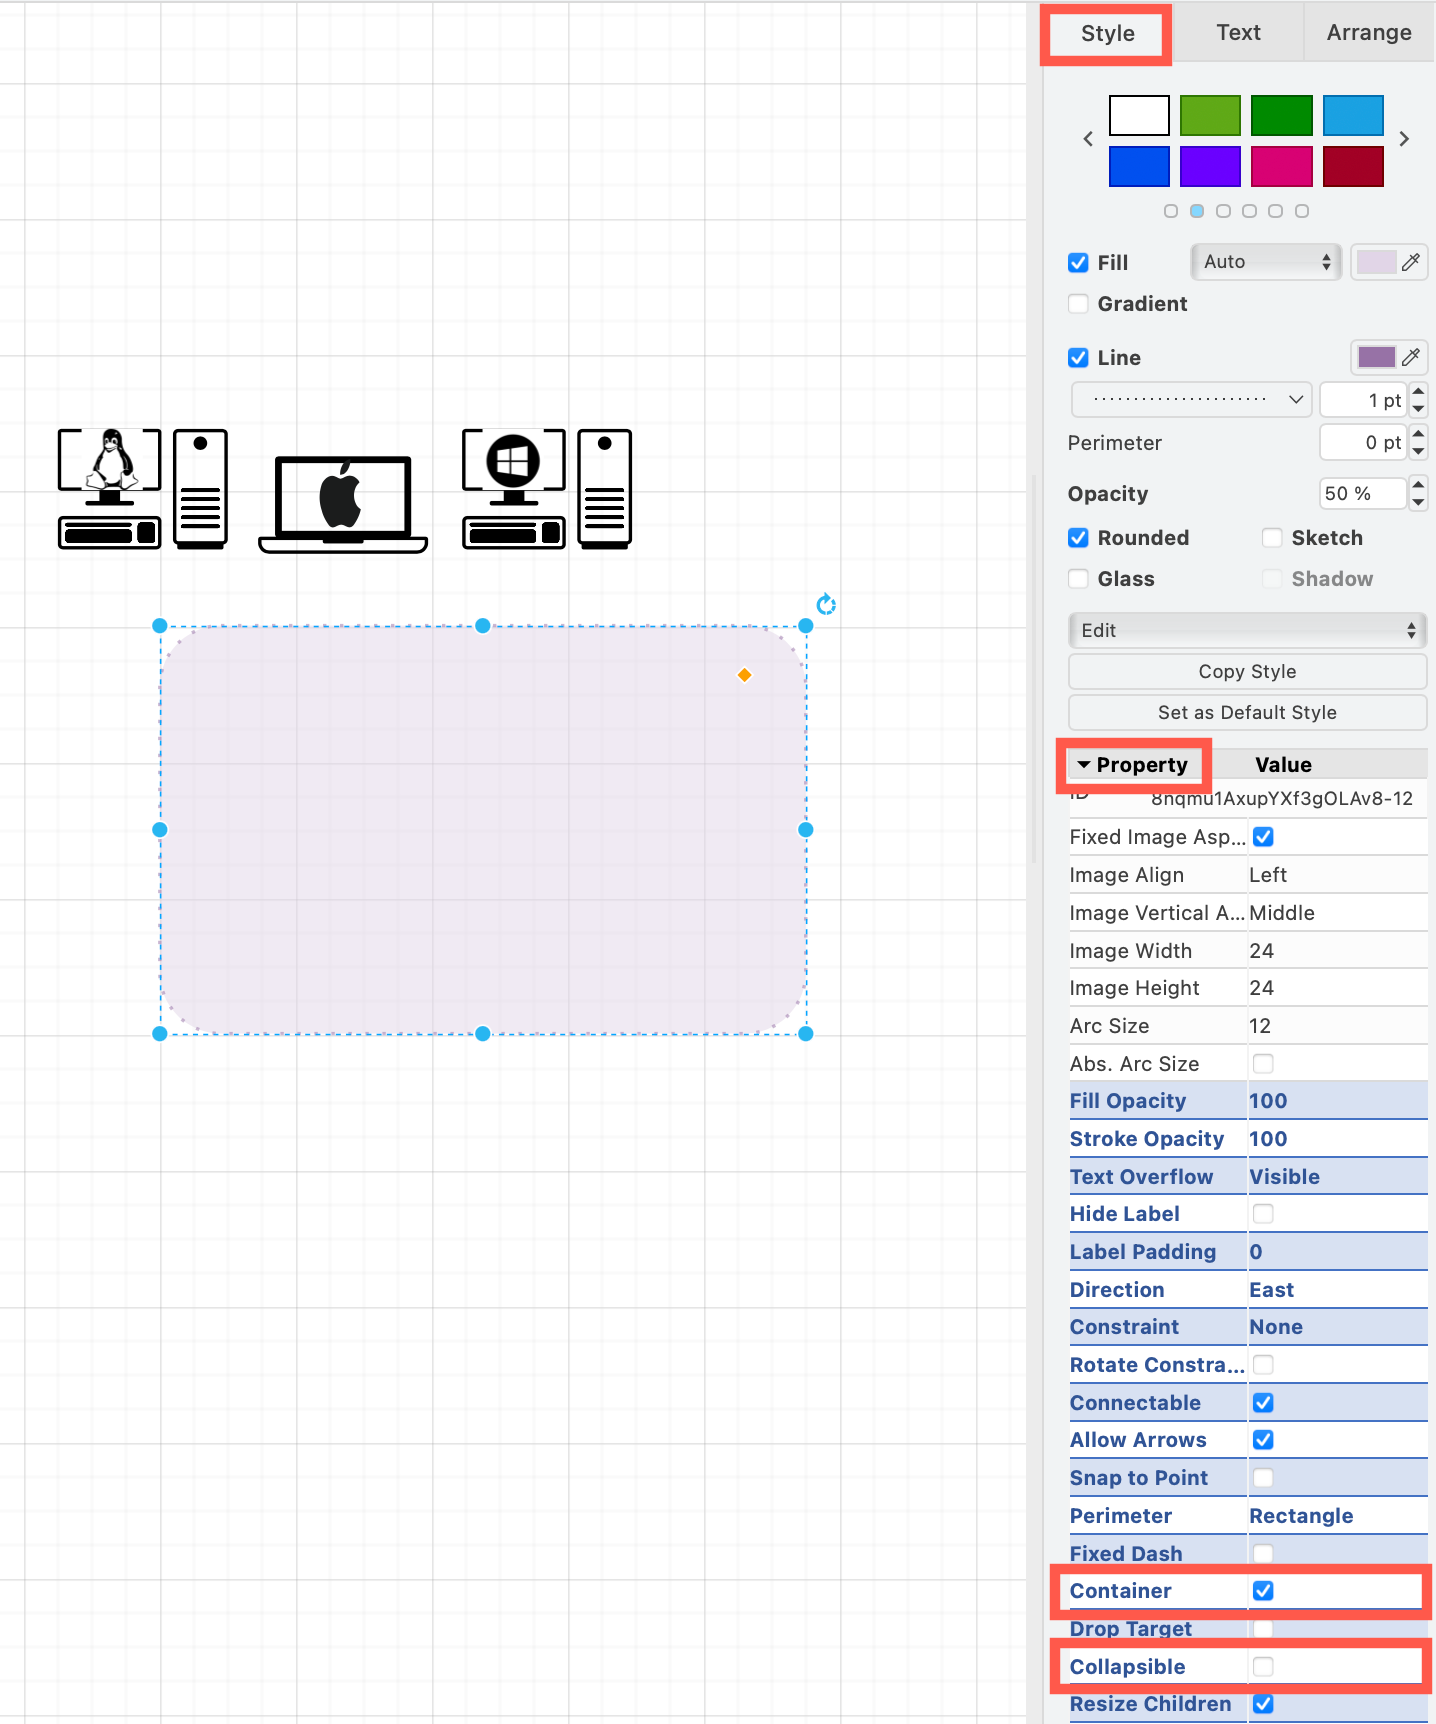
- Select the rectangle zone shape, expand the Properties in the Style tab of the format panel and enable the Container checkbox. Ensure the Collapsible checkbox is not enabled to always keep it expanded.
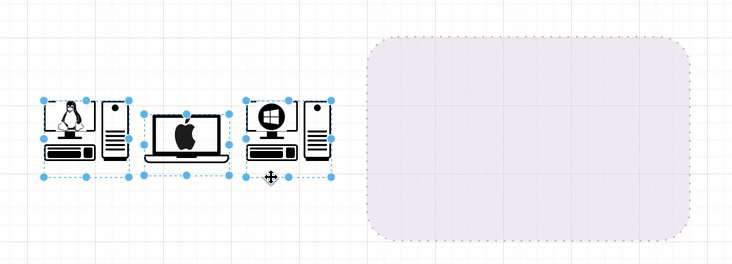
- Drag the devices that belong in that zone over the rectangle and drop them when its outline is purple in light mode, or green in dark mode.
Now you can move and resize the container and its devices inside will move and resize with it.
Use placeholders for smart IP labels
You can use a shape property on the container zone that assigns a subnet address, then use a placeholder in the device label. When you move a device from one zone to another, its label will automatically update.
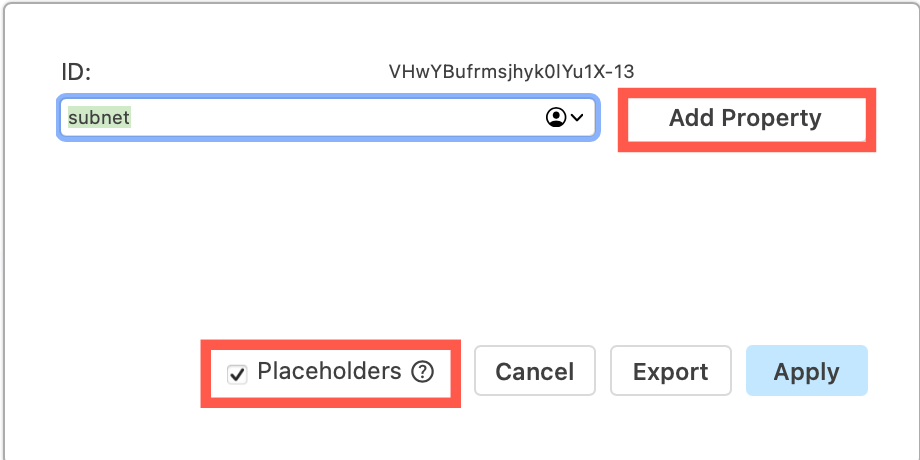
- Right click on the container shape and select Edit Shape.
- Enter the name of a shape property and click Add Property and enable the Placeholders checkbox.
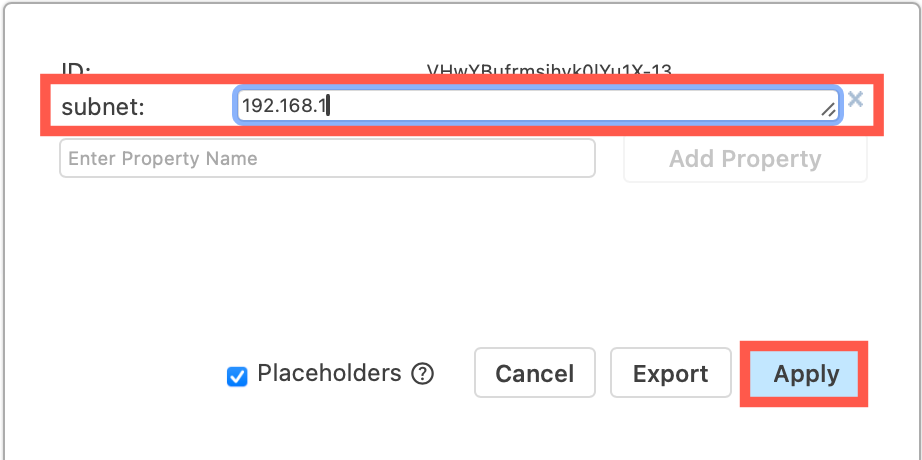
- Enter a value for the shape property (in this case, the subnet address) and click Apply.
- For each shape in the zone, right click and select Edit Shape, enable the Placeholders checkbox and click Apply.
- Click on a shape and type the container zone’s property name surrounded by percentage characters (
%) in the label to add the placeholder. You can add other text before or after the placeholder. In this example the label is written as%subnet%.4which will display as192.168.1.4.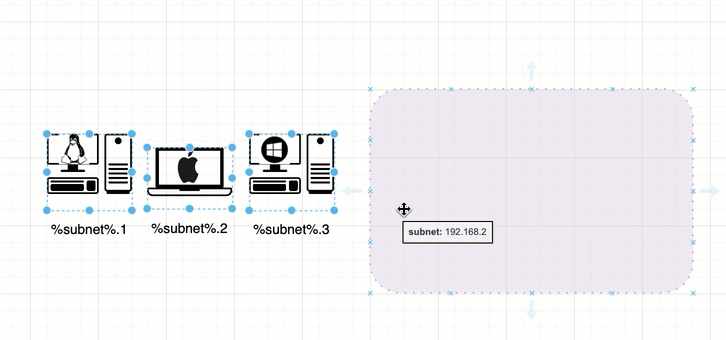
Tip: Change the container’s property and the labels of all its devices will update automatically.
Learn more about placeholders in draw.io
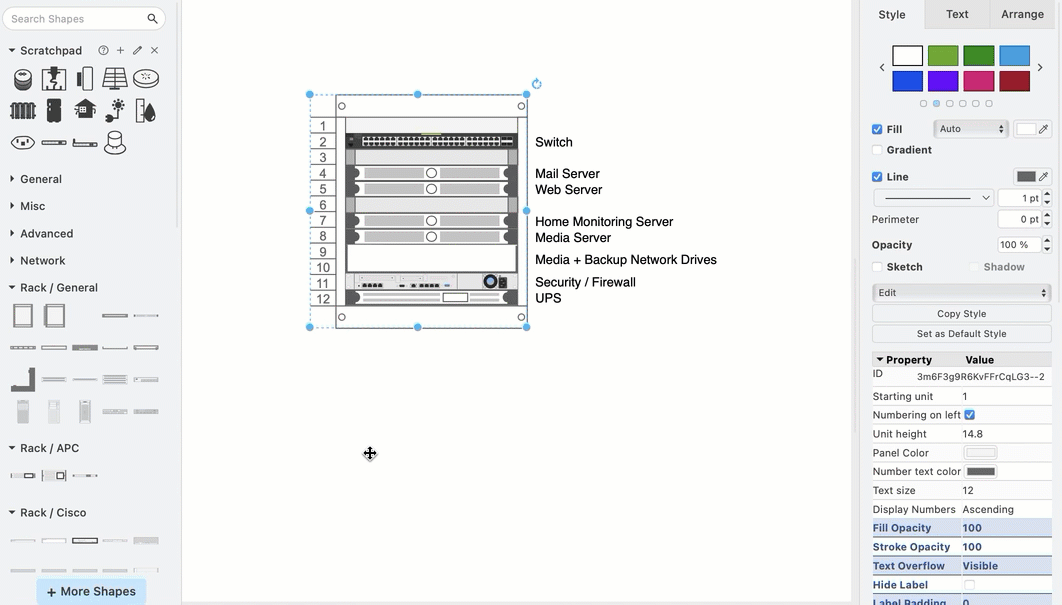
Rack diagrams for complex smart homes
Rack diagrams, just like their physical counterparts, hold servers, switches and other components neatly together.
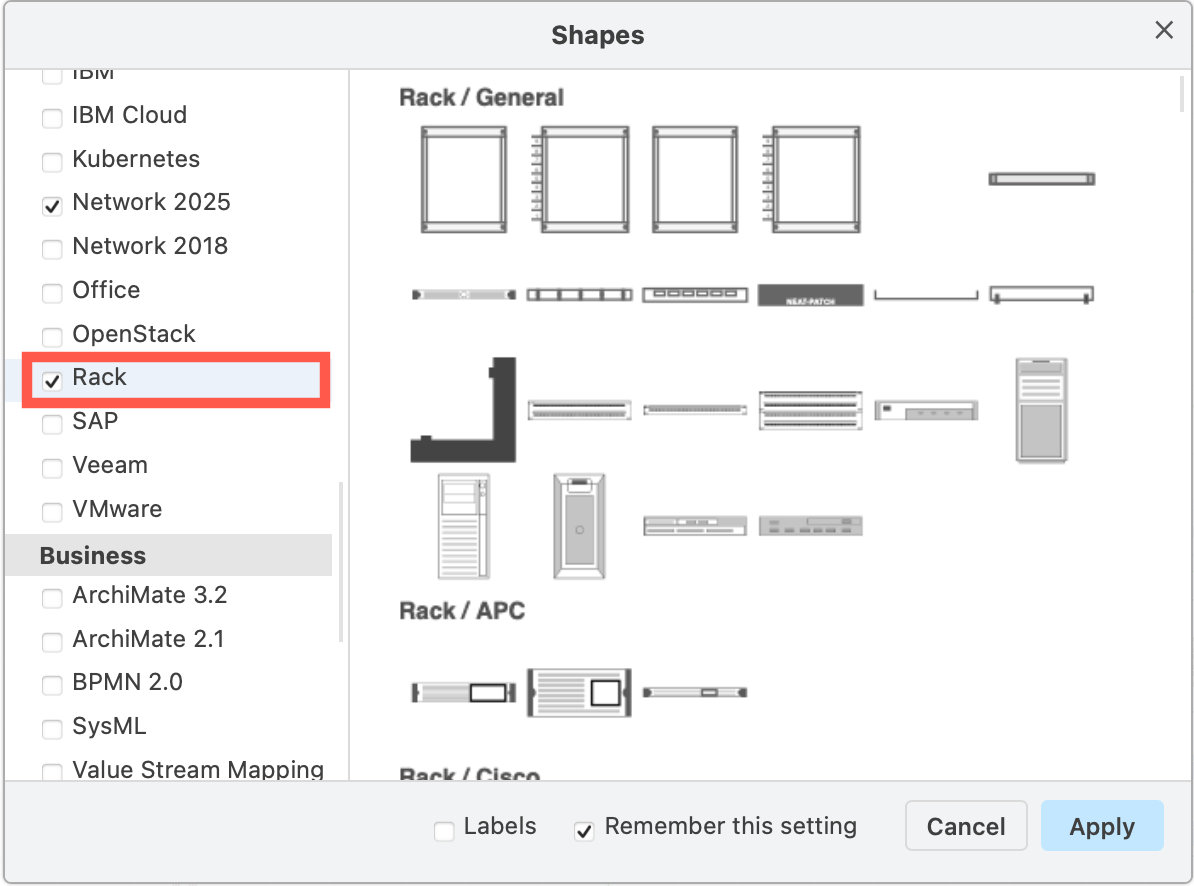
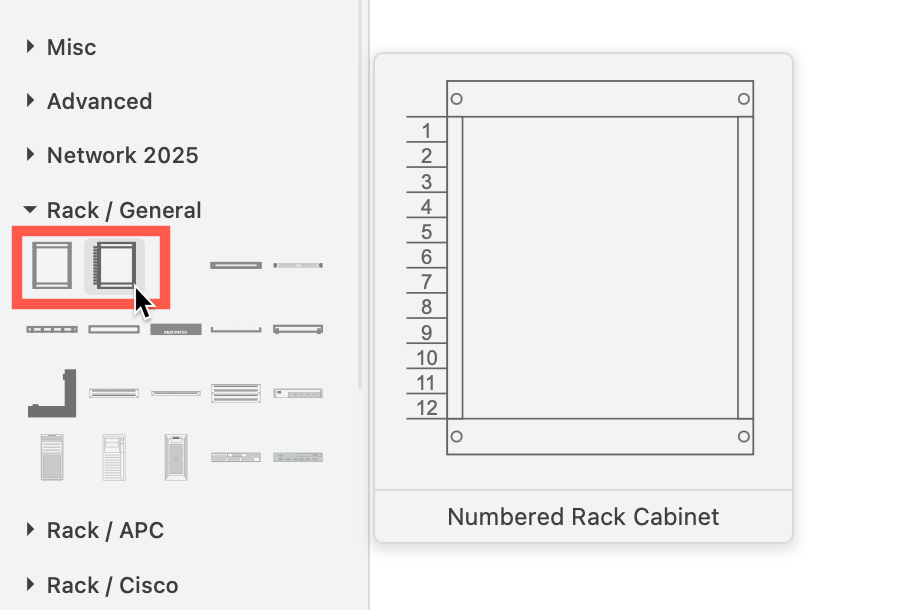
- Click on More Shapes and enable the Rack shape library.
- Add one of the rack container shapes to your diagram.
- Drop each element of your rack just under the one above and it will fall into position.
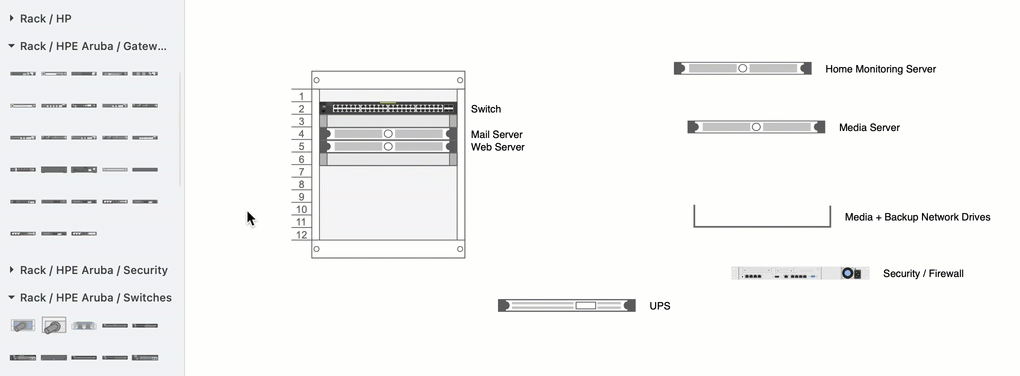
Open this rack diagram example in draw.io
Save your custom shape library
- Drag each of your custom shapes from the drawing canvas onto the Scratchpad.
- Edit the Scratchpad (click on the pen icon). Name each custom shape if you want to.
- Export and save your custom shape library to an
.xmlfile.